Tooltester is supported by readers like yourself. We may earn an affiliate commission when you purchase through our links, which enables us to offer our research for free.
If you’ve ever had a hard drive failure, you’ll know that a backup can be the ultimate life-saver.
If you’ve built your website with an online website builder, all your data is stored in the “cloud”. Your provider will take great care to make sure nothing ever gets lost. But sometimes unfortunate things happen: for example, you may delete a page on your site only to realize that this was a big mistake. In some cases your provider might be able to recover the data – but do not solely rely on this!
I’ve heard of a case where a 1&1 MyWebsite user deleted one main page from her navigation menu, which resulted in the deletion of 100 sub-pages. Unfortunately 1&1 was not able to recover those files.
But you don’t need to be afraid, because there is a simple and free tool that creates backups for you.
Tutorial: Using HTTrack to backup your website
Just one word upfront for users of Weebly, Squarespace or Yola: these tools provide a convenient built-in backup feature. Webnode does too but not in their free plan.
Please note: HTTrack does not have a version for Mac OS yet. For a free Mac alternative you can check out sitesucker.us.
Step 1: Download HTTrack – it’s free!
Go to HTTrack.com and download the right software for your computer.
Step 2: Install it and open HTTrack
This will be your starting screen:

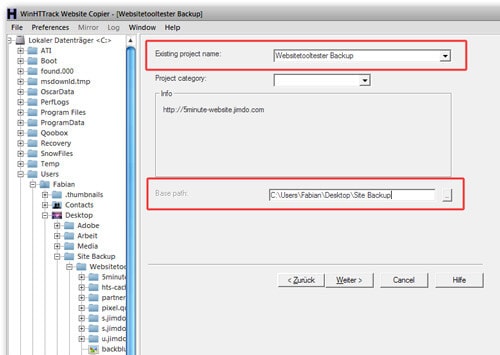
Step 3: Choose a name for your project and select a backup location on your computer
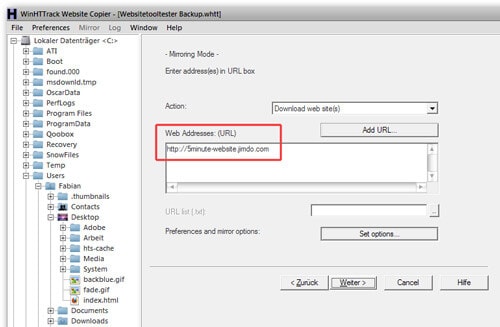
Step 4: Add the URL(s) of your website and hit “next”
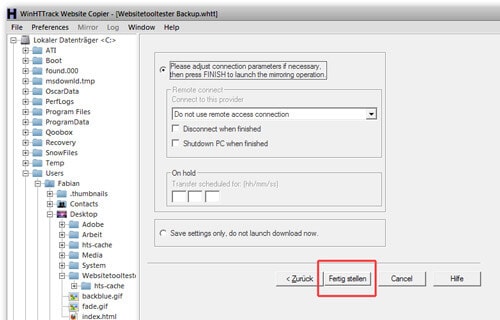
Step 5: The connection settings should be fine. Click on “Finish”.
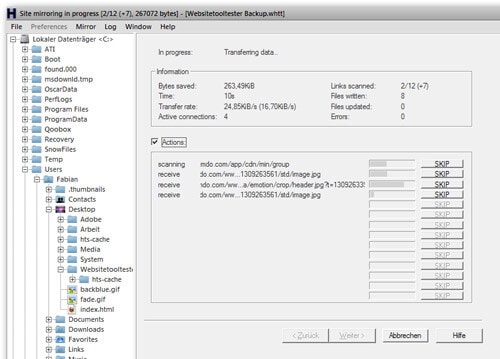
Step 6: This is what the progress screen looks like – it will now download all pages that can be freely accessed. Password protected areas will not be backed up!
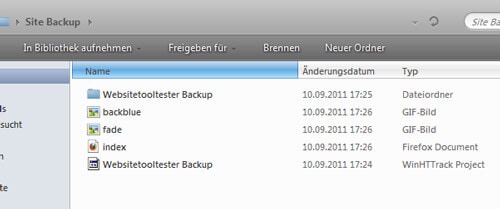
Step 7: Your backup: to access the offline version of your website just open the “index” file.
Tip: put a recurring event in your calendar to remind yourself to create backups.
I hope you enjoyed this tutorial. If you have any feedback or questions, please do leave a comment!
Icon: Shiny Icon Maker / Screenshots taken by Fabian
The author
Learn more about us
THE BEHIND THE SCENES OF THIS BLOG
This article has been written and researched following a precise methodology.
Our methodology