Tooltester is supported by readers like yourself. We may earn an affiliate commission when you purchase through our links, which enables us to offer our research for free.
Website builders are often touted as “the easiest way to build a website”. And when we’re talking website builders, they don’t get any bigger than Wix – it boasts over 200 million users worldwide (you can see some examples of real Wix websites here).
Despite this, Wix’s countless editing and customization options can make it overwhelming for new users.
In this comprehensive Wix tutorial, we cover the main things you need to know to build your own website in Wix – covering each step along the way.
While we won’t get into the nitty-gritty of every single thing you can do with Wix (there are way too many!), we promise: by the end of this Wix tutorial, you’ll know enough to have a simple but professional-looking Wix website ready for launch.
So, let’s jump straight into it!
Who is this Wix Tutorial for?
In this Wix tutorial, we’ll be putting together a basic photography portfolio website. So, if you’re a photographer, designer, artist, or creative professional, you’ve come to the right place!
We’ll also take you through adding an appointment booking calendar, contact form, and optimizing your site for search – so, if you’re a small business or freelancer looking to add these features, this tutorial will be just as relevant.
Wix is designed to be beginner-friendly, so it doesn’t matter what your level of technical skill is – with this tutorial, you’ll be able to create a fully-functional Wix website in no time!
For some extra insight, you might like to check out our Wix review to learn about its pros and cons:

Step-by-Step Wix Tutorial
Feel free to follow the steps in our video or read the written version instead. Or use both. Whatever works for you!

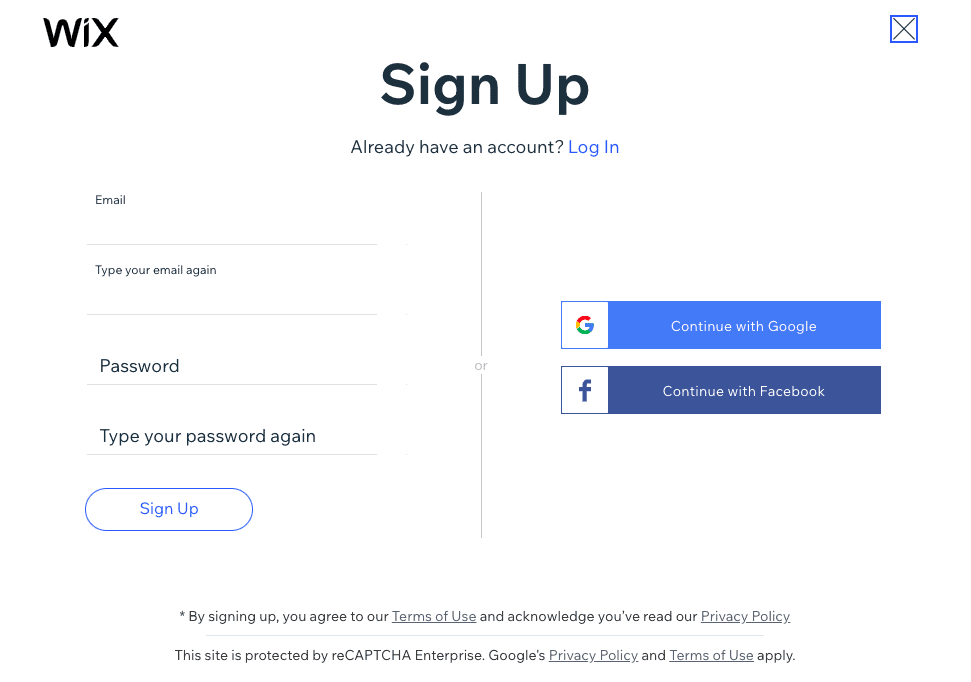
Step 1 – Sign up for Wix
To start, go to Wix.com to create an account. (Note: Wix occasionally makes changes to their interface, so the next few steps might not look exactly the same for you, but even so, it’s pretty intuitive so should be able to easily follow along.)

Click on the “Get Started” button, and create a new login, or login with your existing Google or Facebook account. At this stage, it’s all completely free to use, so you won’t need to hand over any payment details.
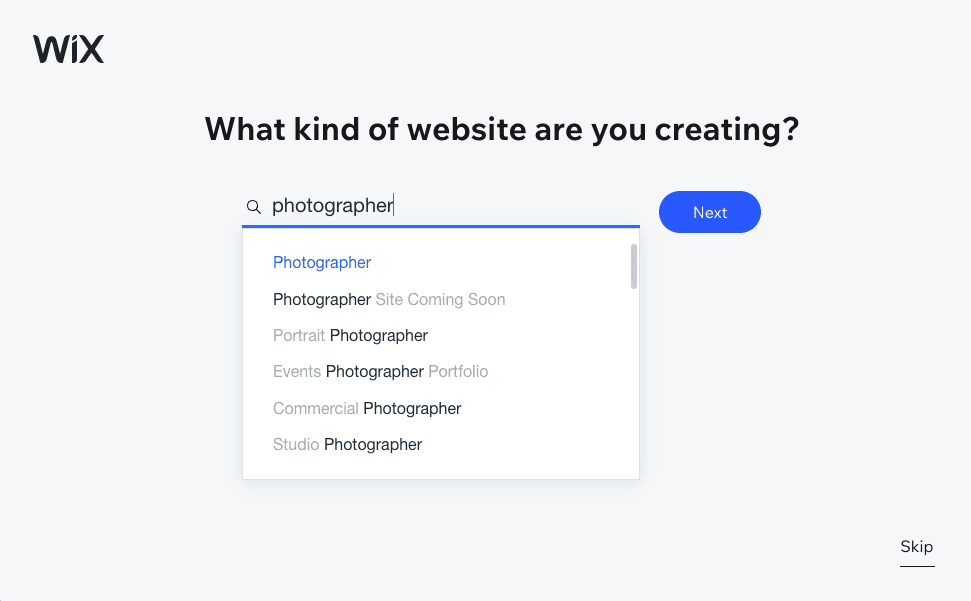
Step 2 – Choose your website category and features
The setup wizard then asks you a few questions about what type of site you want to create. In our case, we’ll type in “photographer” and click on “Next”, but you can of course enter the category relevant to your site.
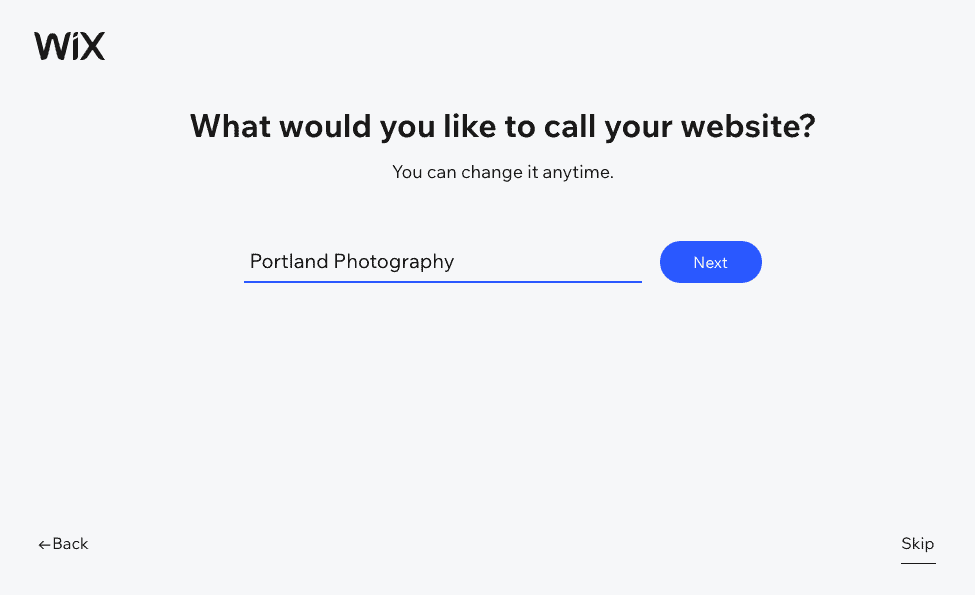
Enter the name of your website (this can be your business name, project name, or your own name), and click again on “Next”. This will display in your website’s page title, but you can change this later if needed.
It will then ask you if you need certain features. In our case, it recommends a Portfolio to showcase work, and Bookings so that customers can book an appointment online for a photo shoot (or any other services we might offer).
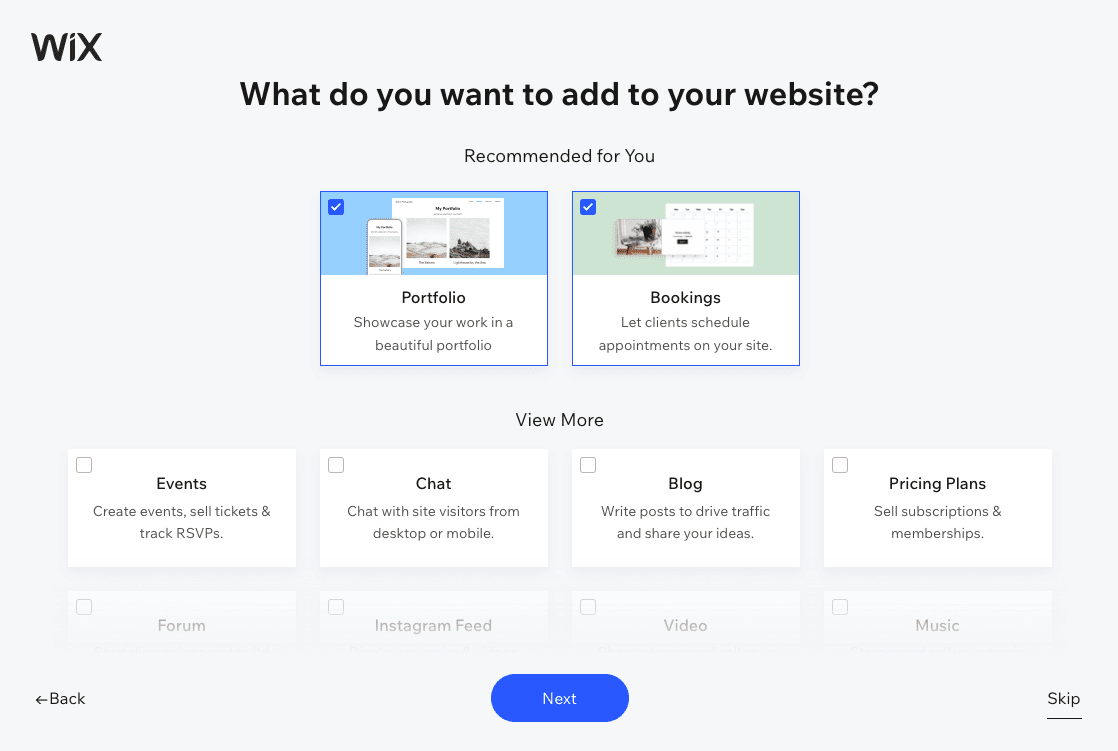
Tick to choose the features you want to add to your site, or hit “Skip” if you’d prefer. You can add or remove these at any time, so don’t worry if you change your mind later.
Step 3 – Choose Your Website Building Option
Click to reach the Dashboard, which is the control center of your website. You’ll be able to manage your entire site from here, so it’s worth taking the time to explore all the different areas and features.
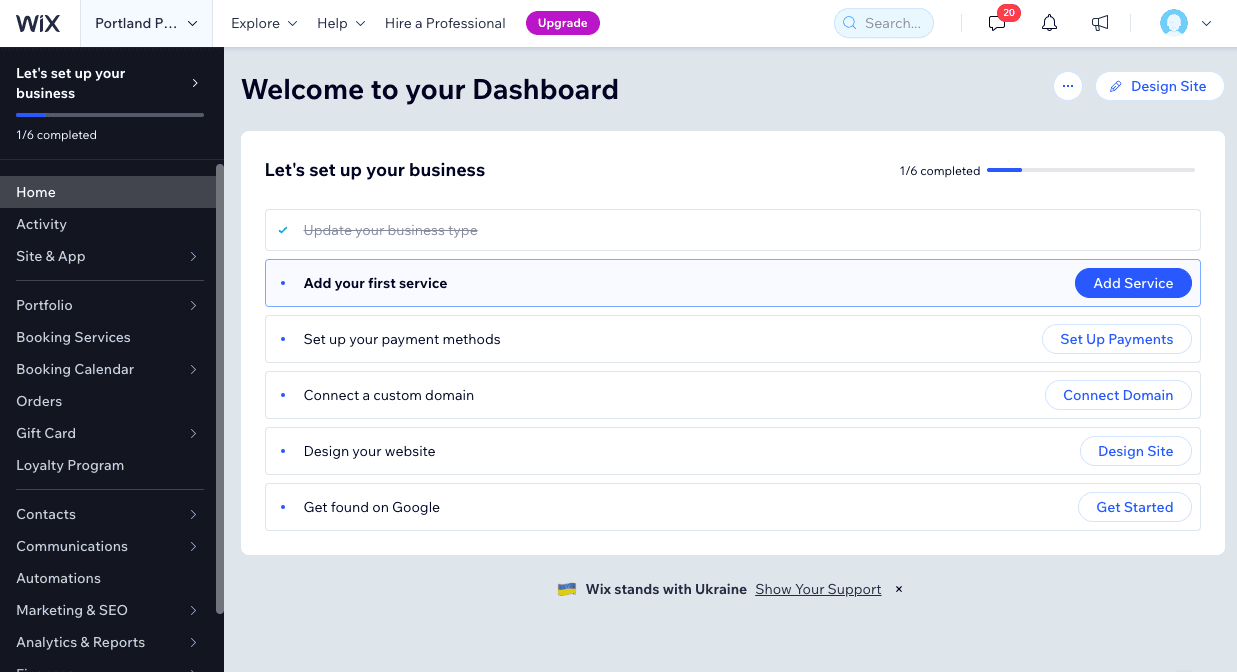
You’ll also see a checklist covering the main steps for building your websites – adding services, connecting a domain, and so on. However, the first thing we want to do is make changes to the content of the site, so click on the “Design site” button in the top right corner.
You’ll then get two options: have Wix create the website for you with its AI builder, or pick a template. Let’s choose the Template option so we can design our site just the way we want it.

Step 4 – Choose a template
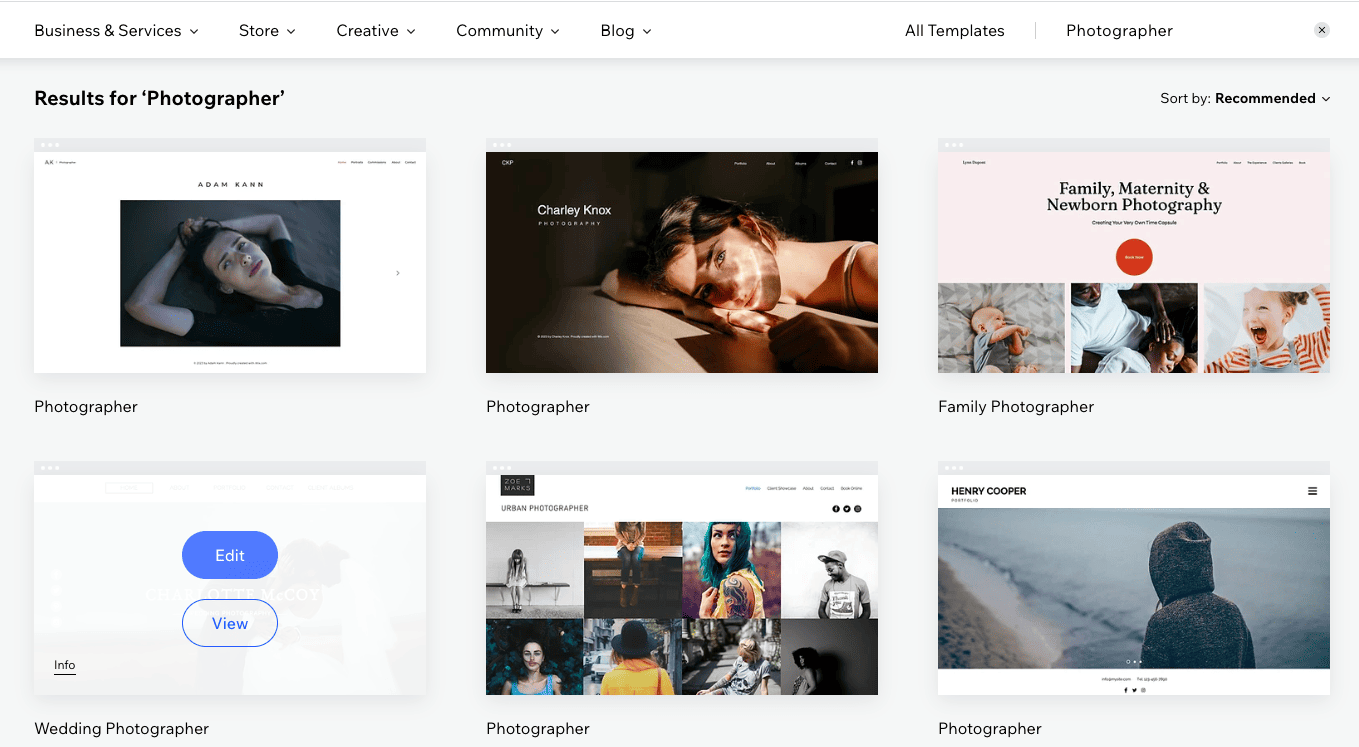
Here we come to one of the most exciting parts of creating a website: choosing a template. As you can see, Wix offers great templates for photographers and creatives in general – one of the reasons why they’re such a popular option for building portfolio sites. Wix has automatically filtered the selection down based on your previously chosen category, but you can change the category to get a wider selection – just click on the menu towards the top of the page, and choose your preferred category.
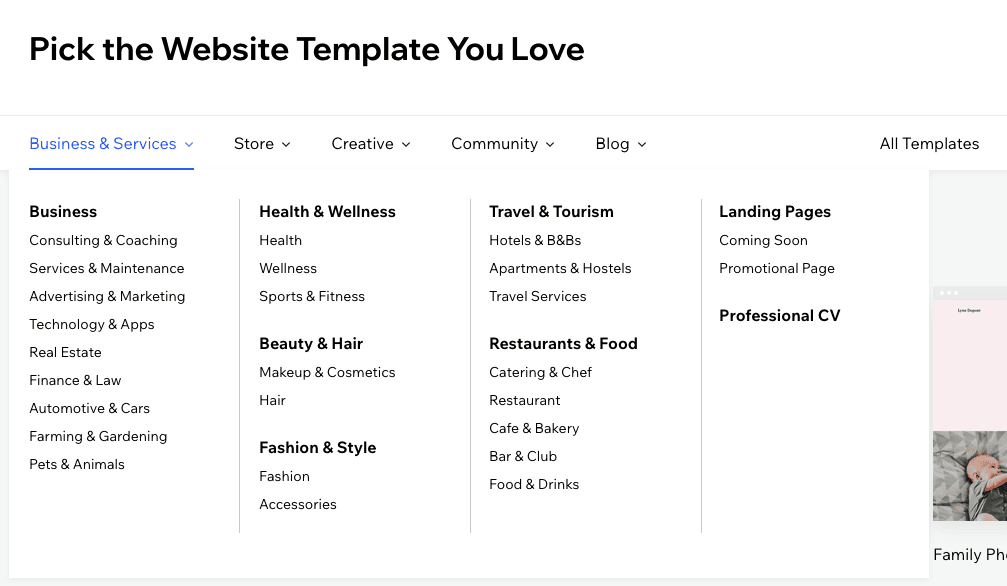
We’re going to stick with the Photographer category and choose the Wedding Photographer template. You can preview the template by hovering over it and clicking on “View”, or start using it by clicking on “Edit”.
Step 5 – Get to know the Wix editor
We are now in Wix’s drag and drop editor. Don’t let all the options put you off: we will guide you through what to do step by step.
First, let me give you a quick primer on the editor, and all the different options on your screen.
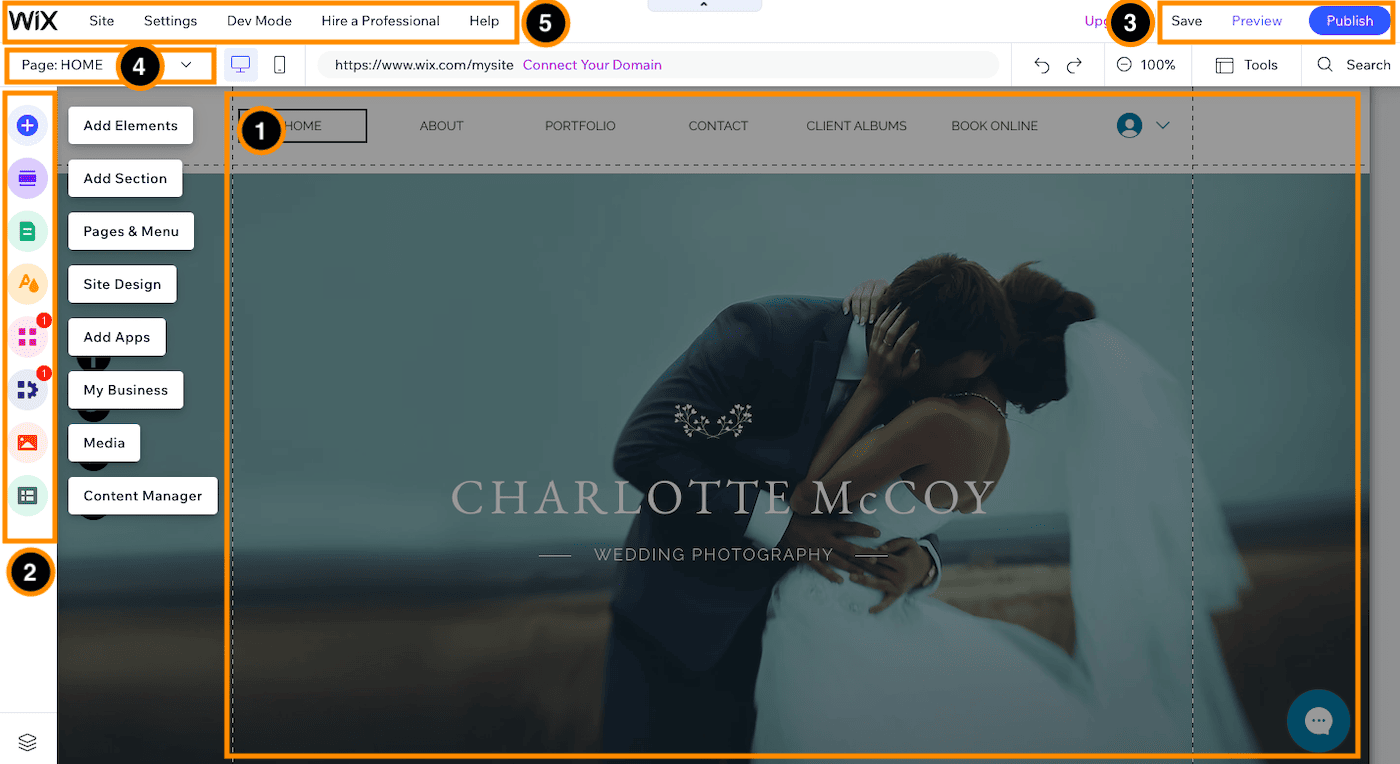
- Editor: Here is where you’ll be making changes to the content of your site – text, images, and so on. The editor is completely drag-and-drop, meaning you can drag any element on your page and place it wherever you like.
- Features toolbar: From this toolbar, you’ll be able to manage the content of your site. You can add in new elements such as galleries, forms, and apps; edit your site’s design; manage your pages, and more.
- Save, preview, and publish: In the top right, you’ll have options for saving your changes (although Wix autosaves changes regularly once you’ve saved your work manually for the first time), previewing your site as a visitor, and publishing your site after you’ve made changes. Make sure to hit the “Publish” button as soon as you’re ready for them to be live, as changes don’t automatically get published (which is a good thing!).
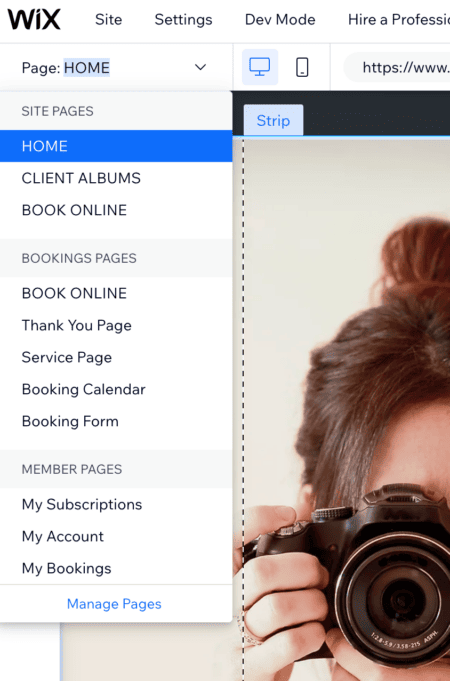
- Page switcher: Here, you can navigate to the different pages of your site, many of which are automatically inserted based on the template you choose. You can also add new pages, delete them, and hide them from public view.
- Backend toolbar: There are quite a few functions here, but the main ones you’ll be using will be under “Settings” – connecting a domain, search engine optimization (SEO), and so on. You can also access Wix’s help center and customer support from the “Help” option.
Step 6 – Edit your images and text
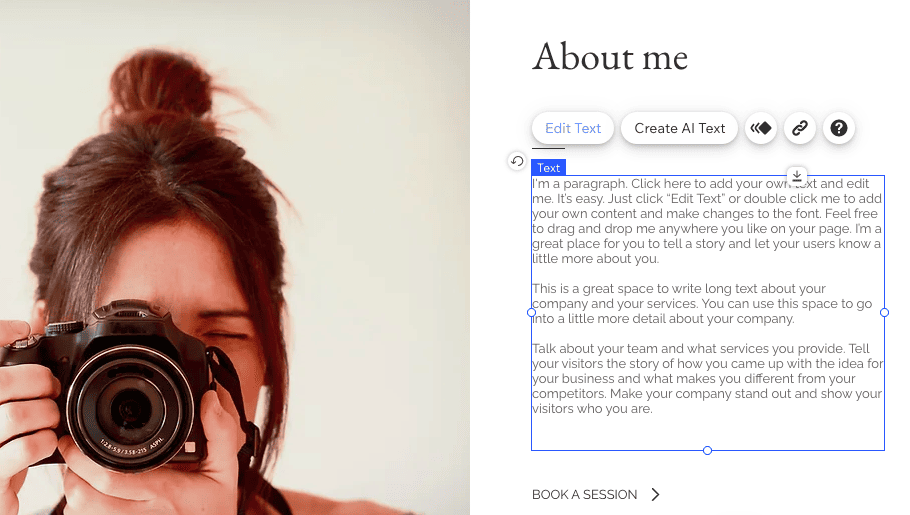
Let’s focus on the home page first. You can customize each element by clicking directly on it – same as with any document editor. You’ll then be able to drag it to anywhere on the page, or to change the content of it.
For example, change text by selecting the text, then clicking on “Edit Text”. You can also choose “Create AI Text” if you need a bit of inspiration. (If these suggestions aren’t good enough, you can of course refer to the almighty ChatGPT or another AI alternative instead.)
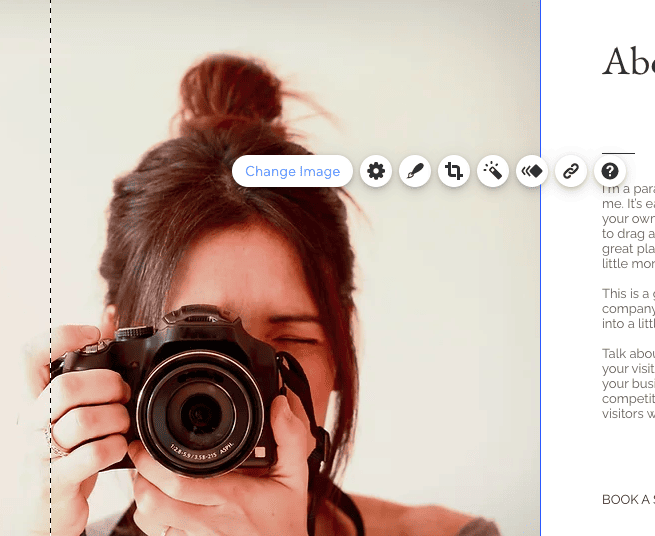
If we want to display a different image, we simply click on the image, then the “Change Image” button. We’ll then be able to upload our own image and replace the current one.
Wix’s editor is section-based, so as you scroll down the page, you can see the different sections within it. It’s possible to add new sections, and to re-order them, too.
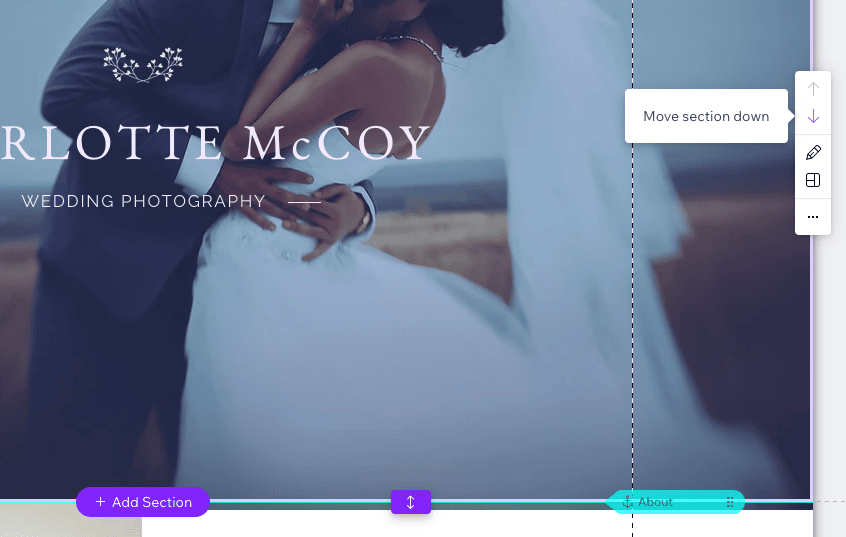
You can customize all the pages of your site one by one by going back up to the Page Switcher. Wix has inserted a few it thinks you’ll find useful, but you can always delete these if you don’t need them.
Step 7 – Add an image gallery
Let’s head over to the toolbar on the left of the screen, where you can add elements and apps to your page.
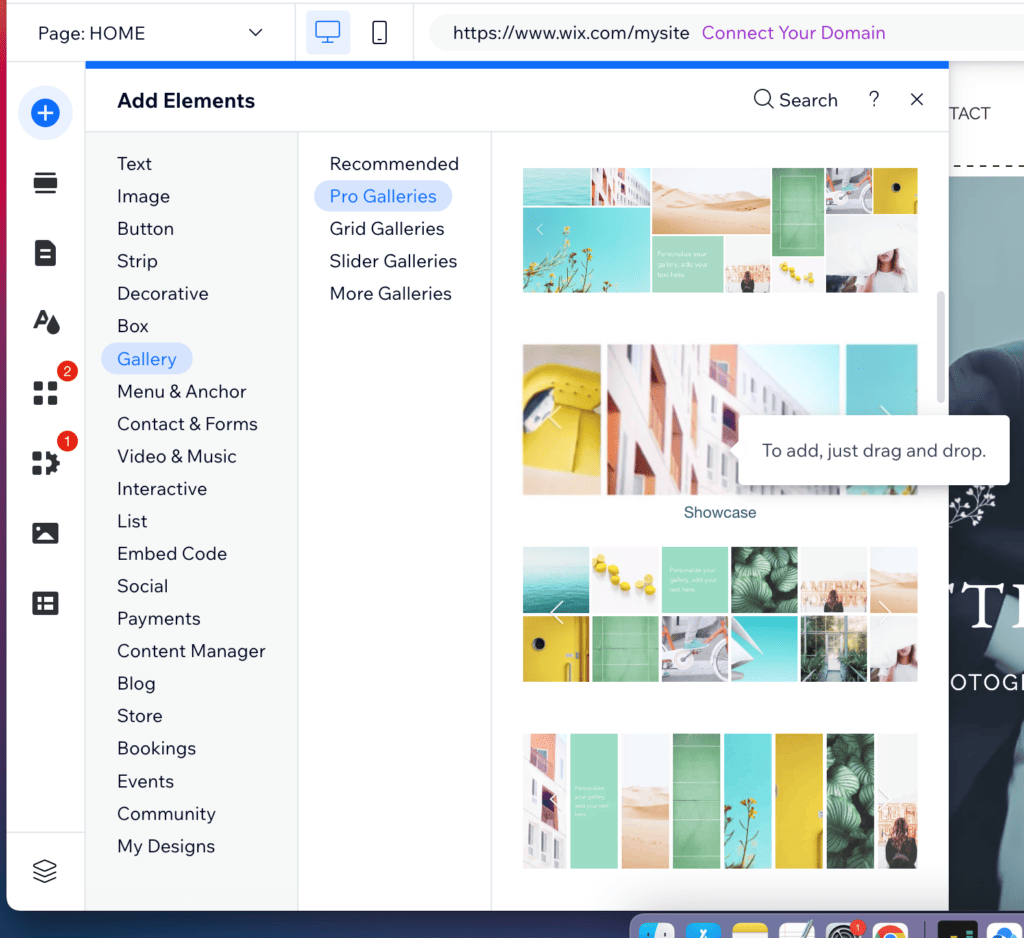
You can add an image gallery by clicking on the + symbol and choosing “Gallery”, then dragging and dropping your chosen gallery anywhere on the page.
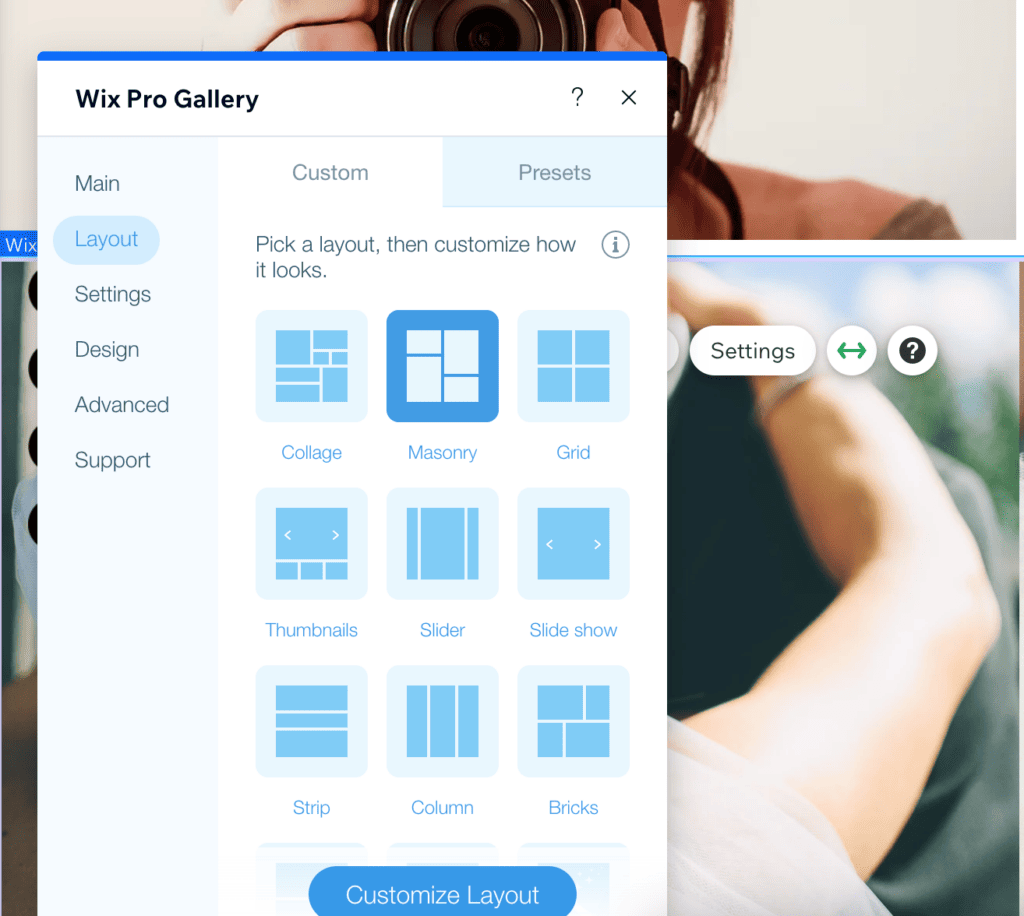
In this template, a gallery has already been positioned under the “About Me” text. To change the layout, select the gallery, click on “Settings”, then click “Layout”. Let’s choose “Grid”. Just note that you might need to edit or rearrange some of the images to get them to display correctly in this layout.
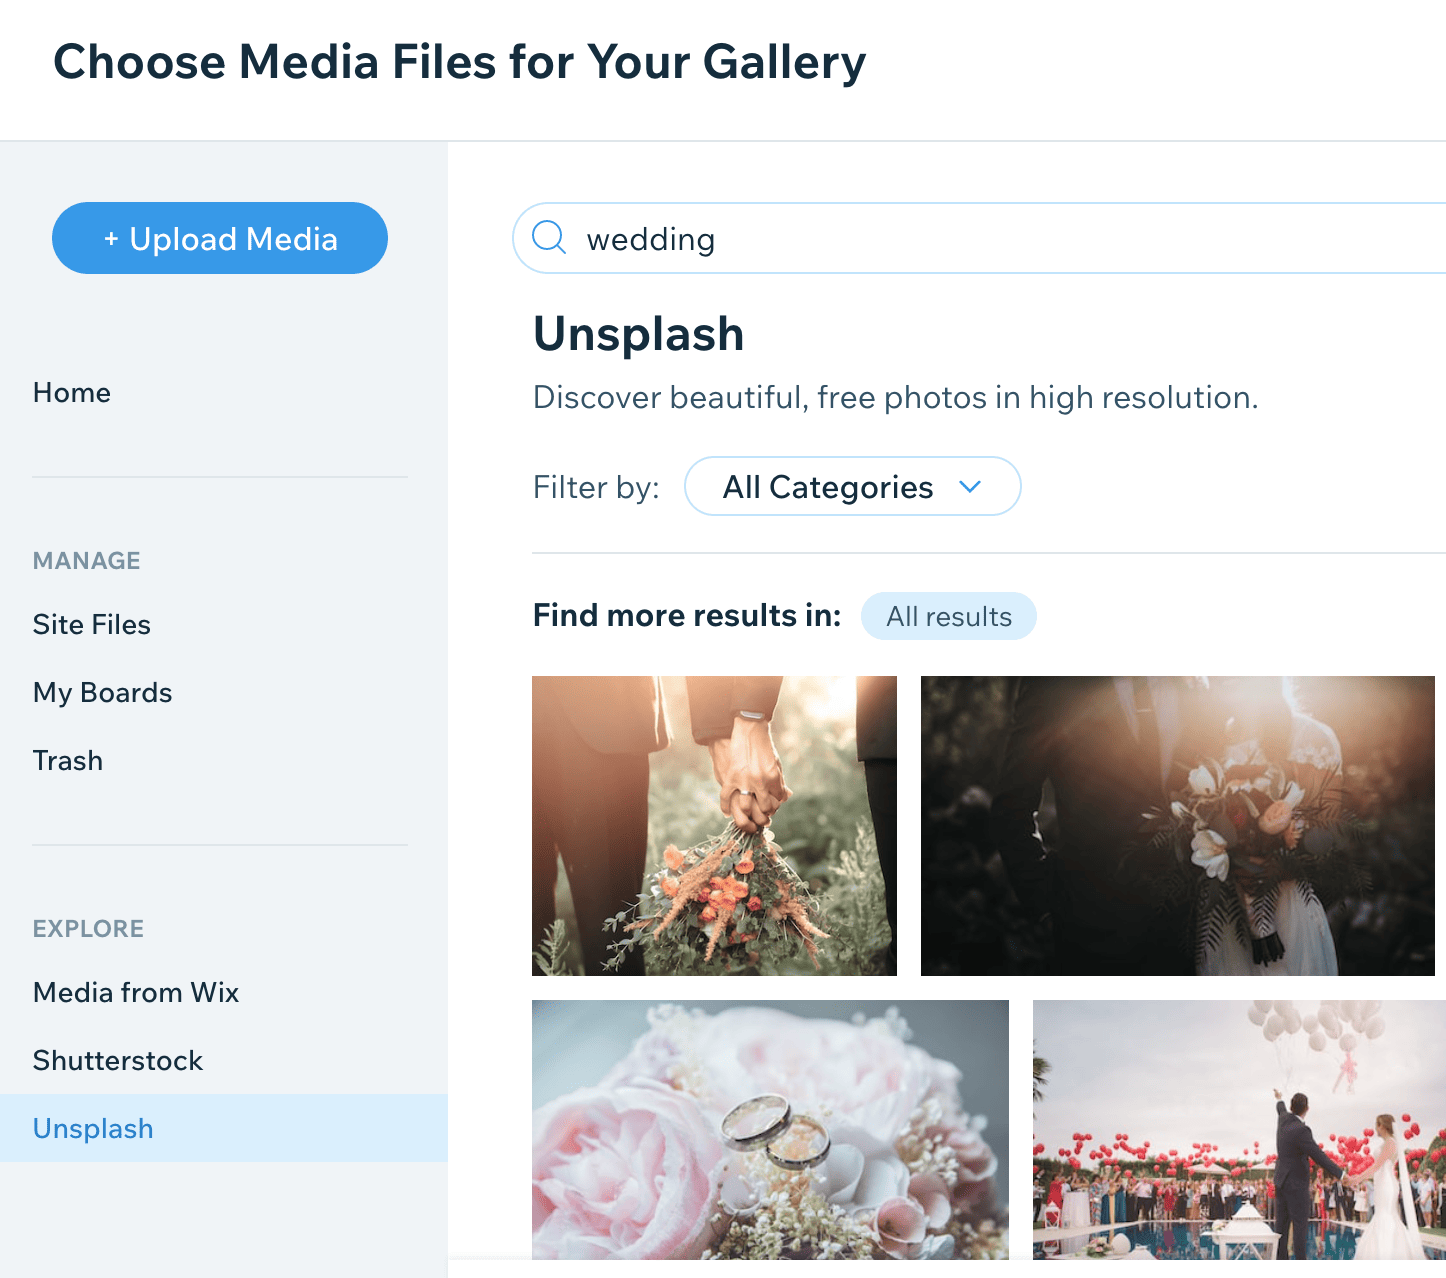
To add your own photos, click on the “Manage Media” button, then “Replace image”, and “Upload media”.

Once again, you can upload your own images, or even choose one from one of Wix’s free stock photo libraries.
Step 8 – Add Wix Bookings
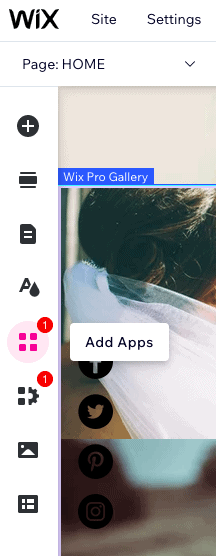
Applications can be incredibly useful for add extra functionality to your site, and Wix has a huge range in its App Market. To add an appointment booking feature, for example, click on “Add Apps” in the left menu.
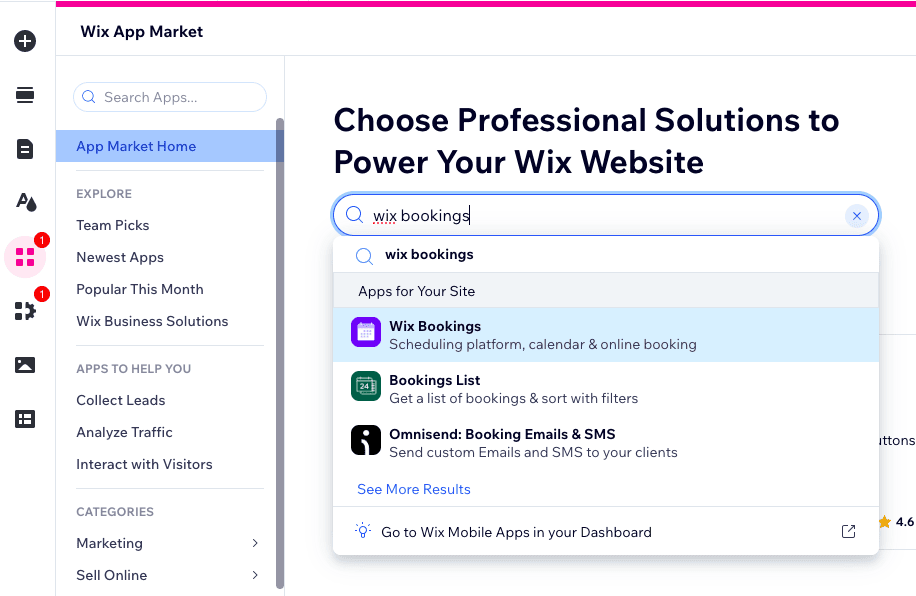
Then do a search for “Wix Bookings”, Wix’s own appointment scheduling app – handy if you’re a photographer looking to take photoshoot bookings through your website. Luckily, we already have this pre-installed in our template so we don’t need to install it again.
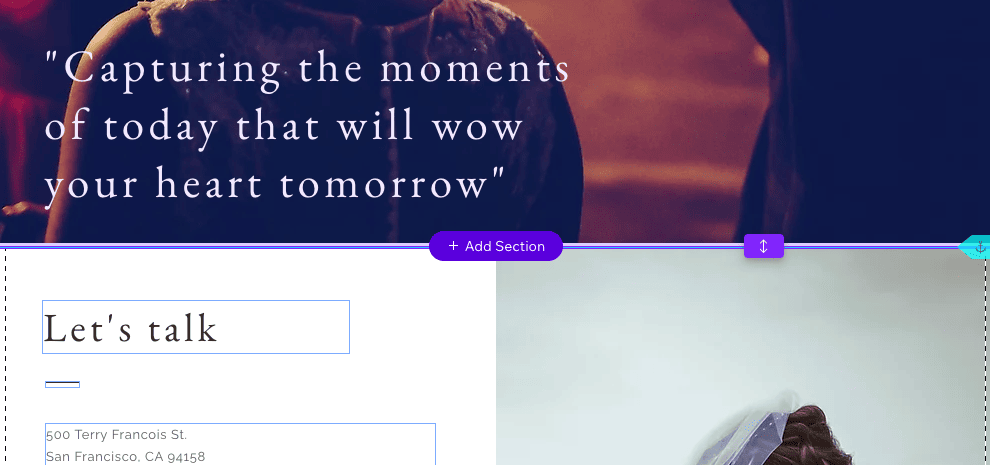
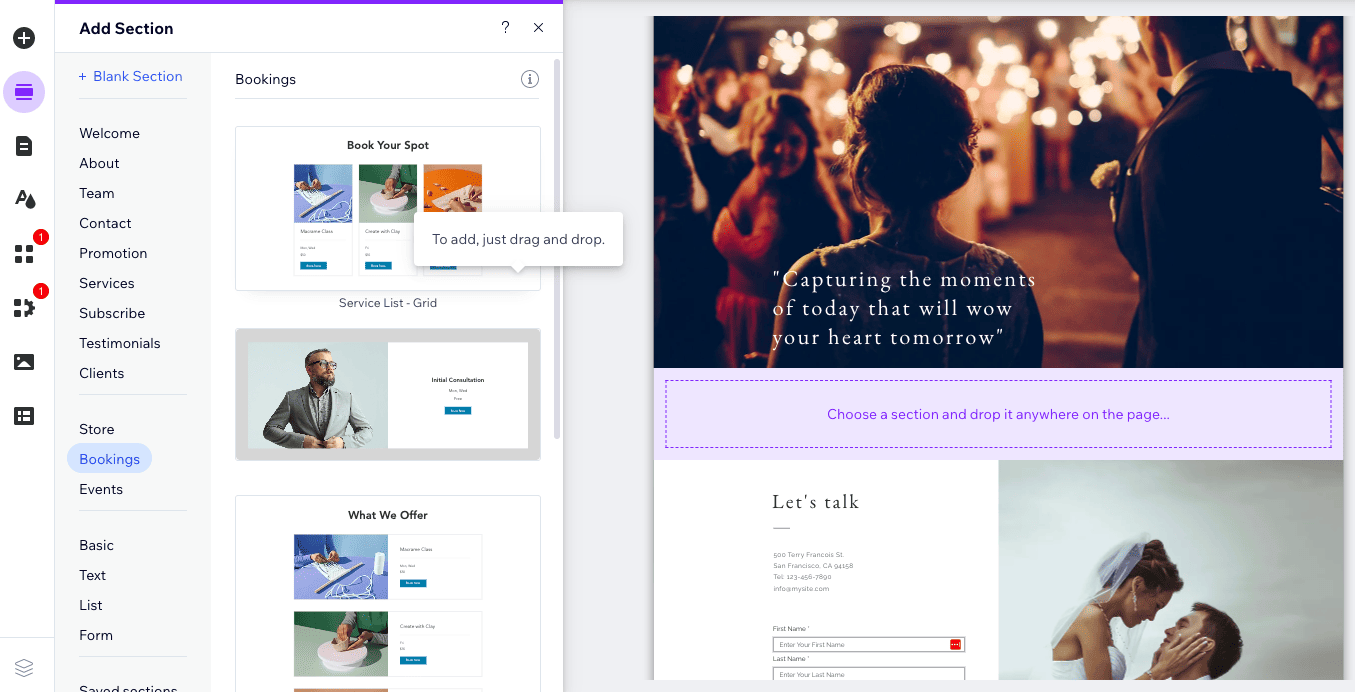
However, if you want to add it to the home page, first create a section for it. You can do that by going to your editor, hovering over where you want to place the section (it needs to be in between two existing sections), and clicking the “Add section” button when it appears.
Then, go down to “Bookings”, and drag your chosen block into your new section.
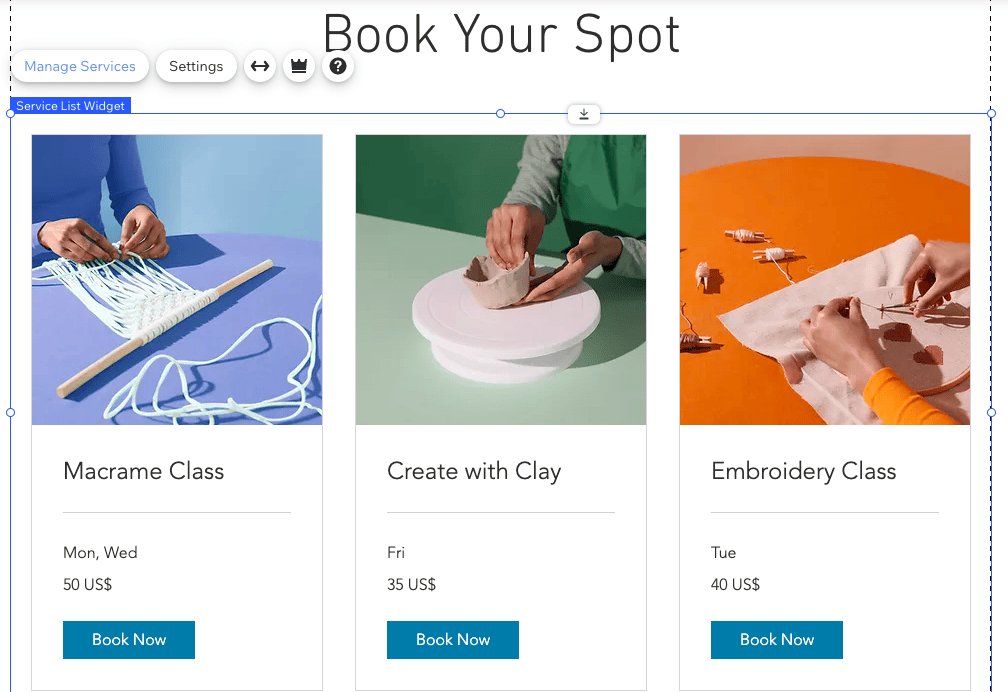
Next, click on the “Manage Services” button which appears above your newly-added section. Don’t worry about the images and text you’re seeing here – these are just placeholders, which will get updated once you add your own services.
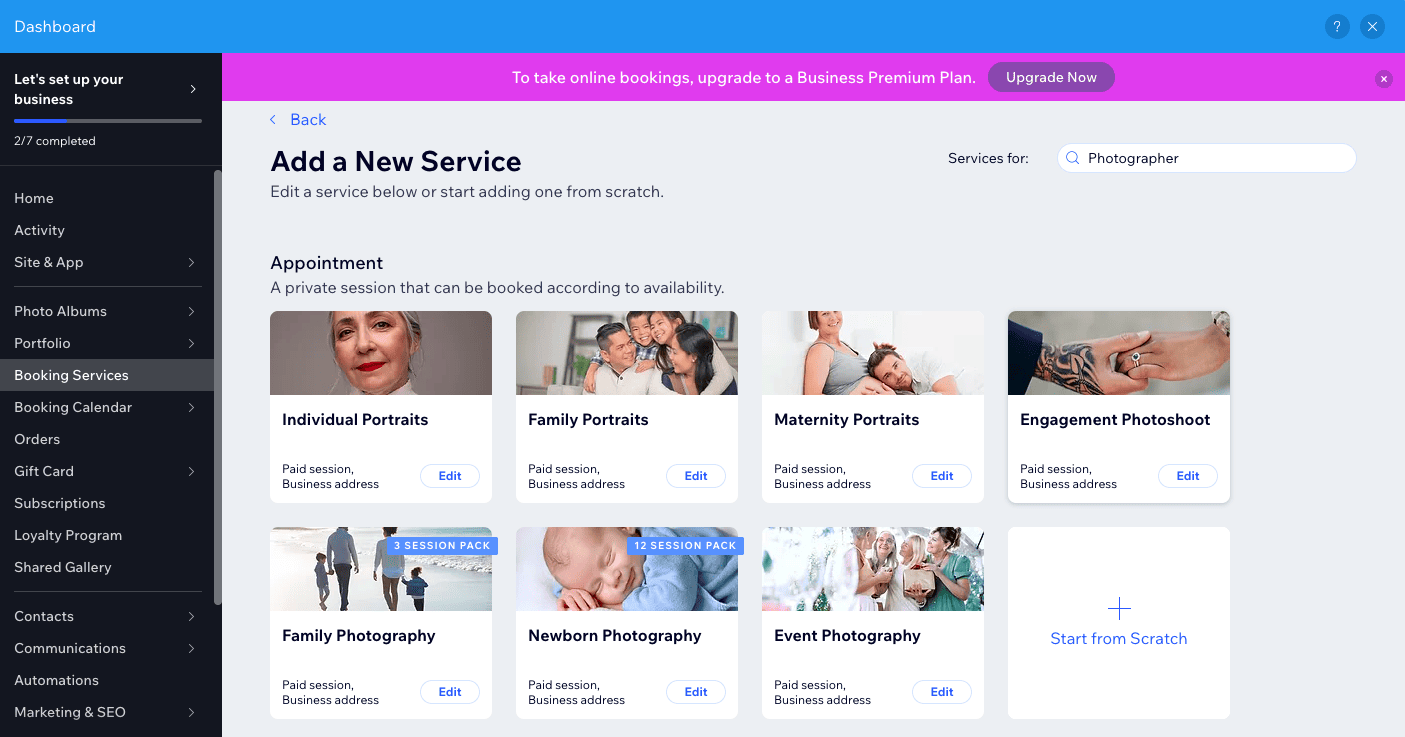
To make things easier, Wix lets you choose from some existing options, such as appointments, classes, or courses, or you can add your own by choosing “Start from scratch”.
Let’s edit “Engagement Photoshoots”. Here, you just need to edit the duration, price and payment options, location details, and staff availability. You can also add more images, and access advanced functions, such as manually or automatically approving requests, and customizing your booking form.
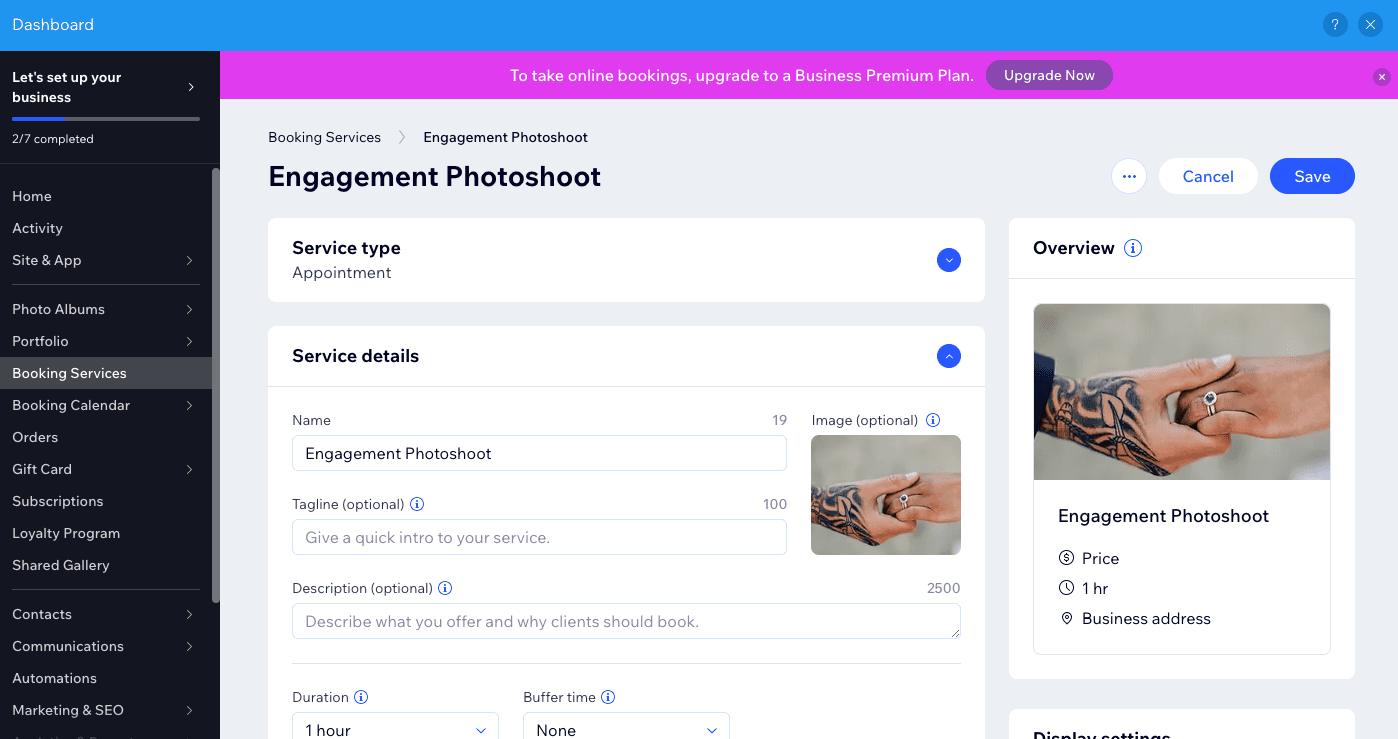
Remember to hit ‘Save’ when you’re done.
Step 9 – Add a Contact Form
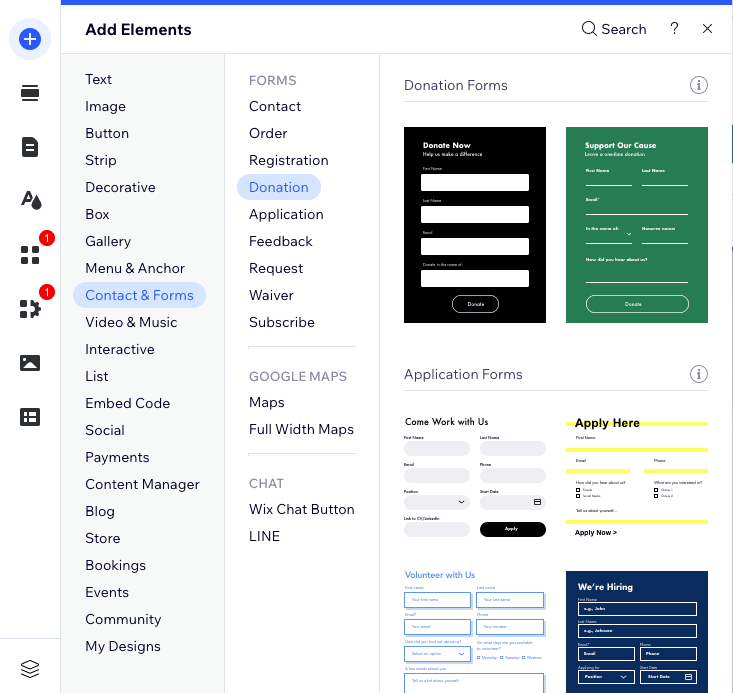
If you want customers to get in touch, it’s essential to add a contact form to your site. In our template, a form has been added to the homepage, just before the footer. If your template doesn’t have one, once again just click + in the left toolbar, and navigate to “Contact & Forms”, dragging and dropping your chosen form onto the page.
To add a new field, click on the form, then the “Add New Field” button. To change the names of the fields, simply click on the block of text you want to change and choose “Edit Field”. Simple!
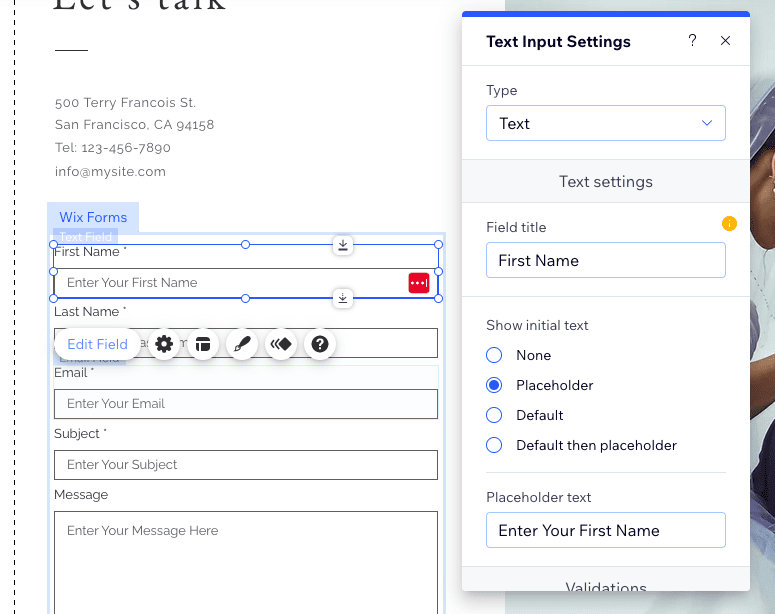
In Form Settings (the button with the gear icon), you can change the name of the form, choose what message to display when a user submits a form, and even accept payments directly through your form (if you’re on a Wix Business plan).
Step 10 – Optimize your site for search
Your website is starting to come together! But one of the most important steps to take before you publish your site is to optimize your site for search. Luckily, Wix have made this very easy to do.
Go to “Settings” at the very top of the page, and choose the “Get Found on Google” option.
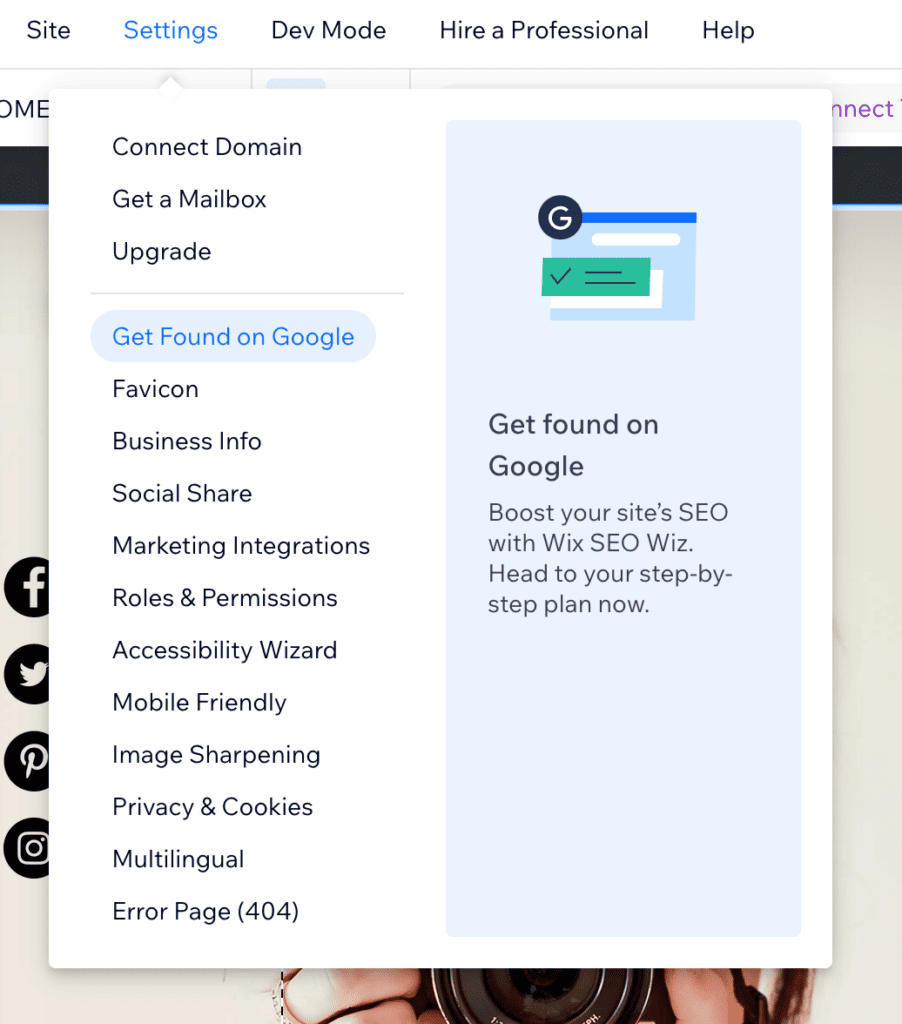
You’ll be taken out of the editor and back to Wix’s main dashboard. Click on the “Get Started” button.

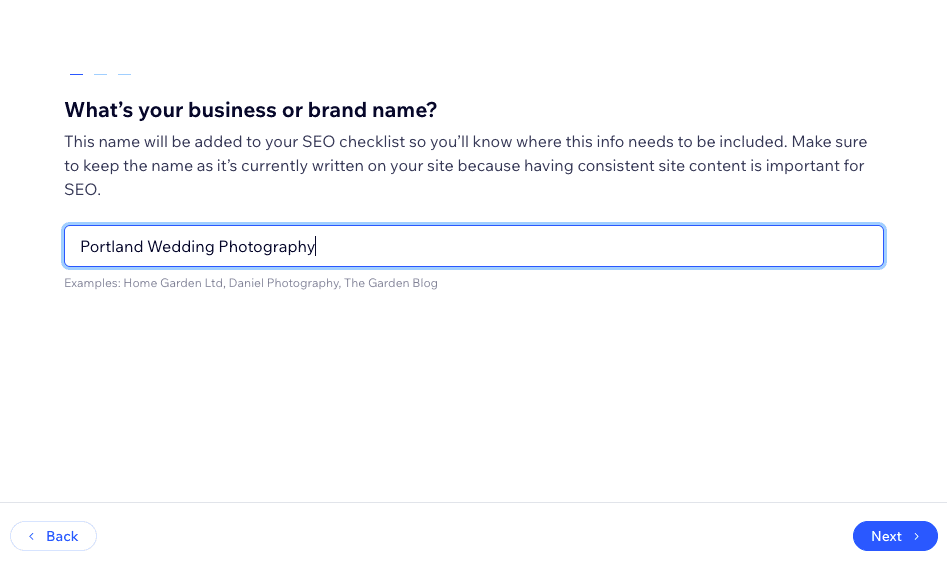
Then, follow the steps. Fill in your business name – for example, ‘Portland Wedding Photography’.
Specify whether you serve your customers locally or not, and if so, add your locations – for example, Portland.
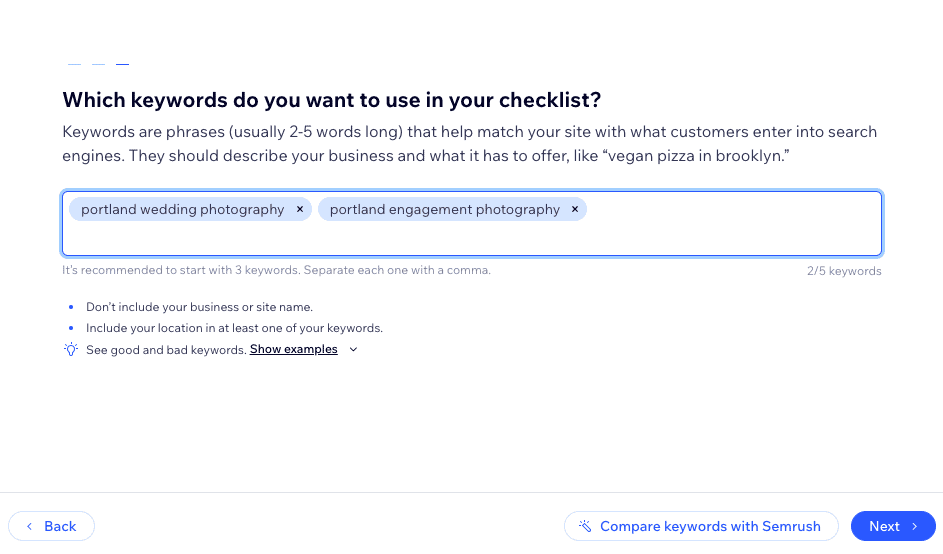
Add some relevant keywords, such as ‘portland wedding photography’ and ‘portland engagement photography’, separating terms with a comma. It’s good to start with a focused list, so just 2 or 3 search terms will do for now.
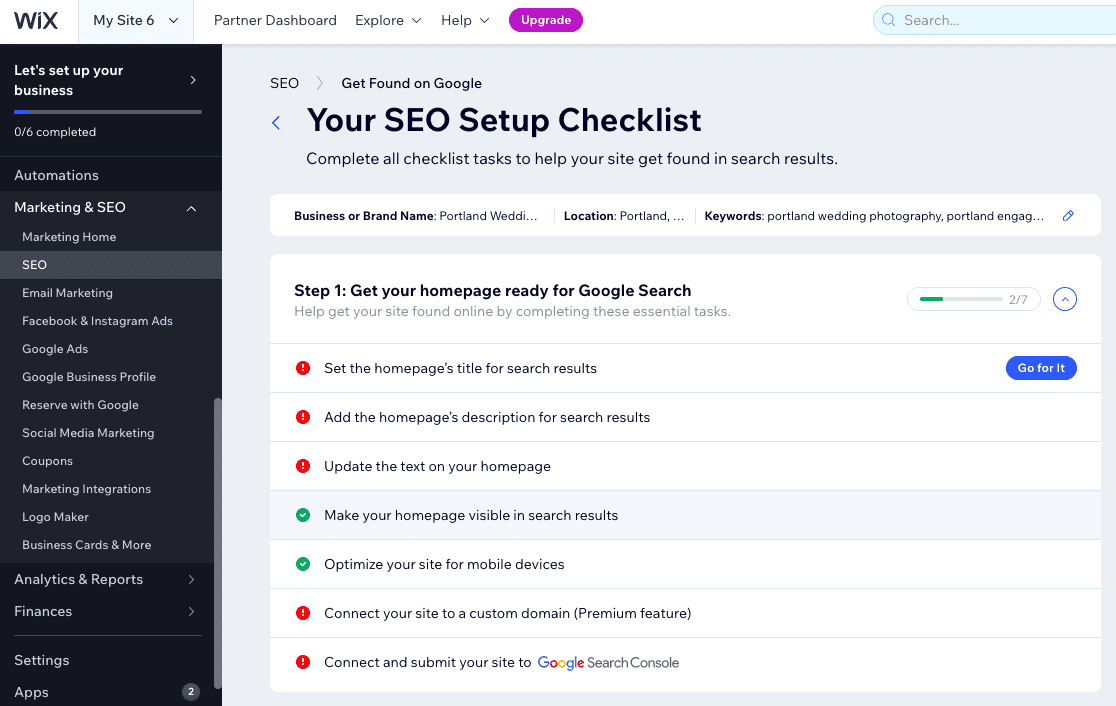
Click “Next”, and you’ll be presented with your personalized checklist of how to optiize your site. Follow each one of the steps by clicking “Go for it” next to each one. Wix will automatically take you to the right place to perform each one of those key steps.
Once that’s done, you’ll have a site that’s ready to be found on Google! Just note that it might take a couple of days for your site to be recognized by Google and to start ranking.
Step 11 – Final tasks
Now for the final steps. Before you publish your site, we’d recommend doing a couple of things.
Finalize your page navigation
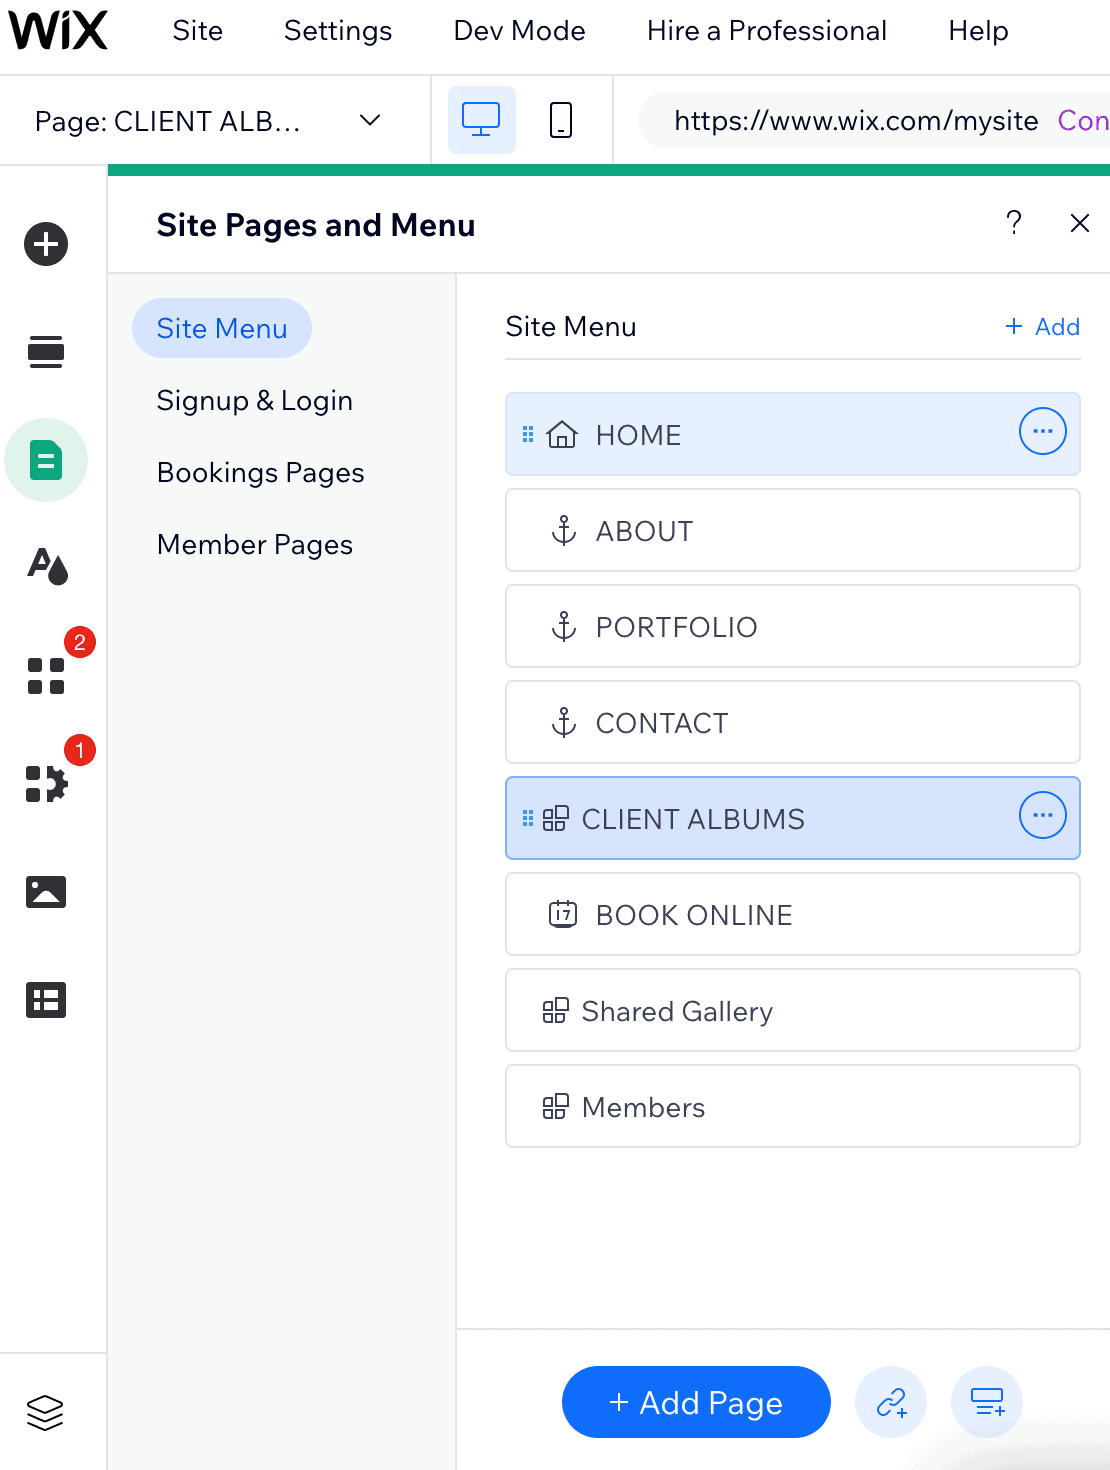
First, head back to your editor, and click on the page switcher in the top left to manage your pages and menu. You can drag and drop the pages to reorder the navigation menu, as well as hide and delete pages.
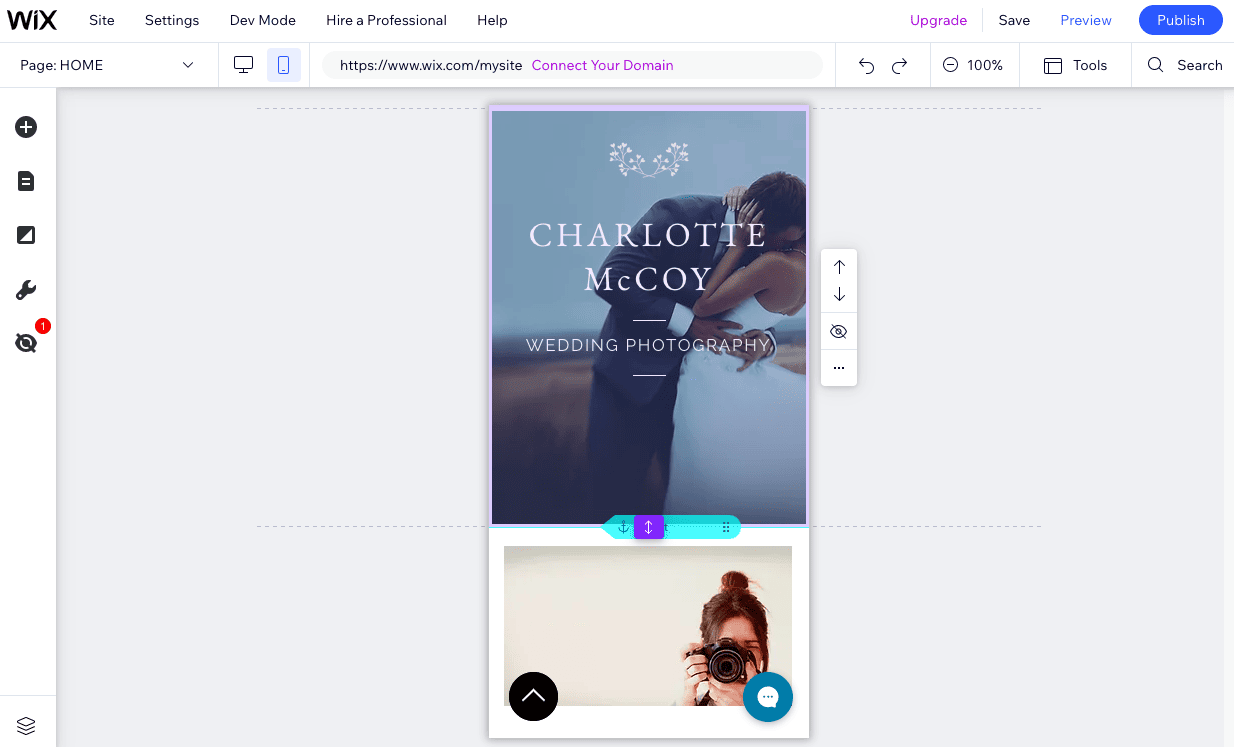
Edit your mobile site
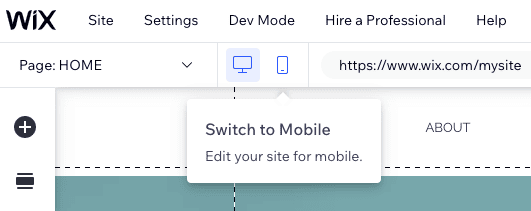
Next, check the mobile version of your site to make sure everything looks okay, as Wix’s mobile designs aren’t always 100% mobile-friendly, and sometimes need a bit of manual tweaking. You can do that by clicking the mobile phone icon towards the top of the page, then making changes in the mobile editor:
Note that the mobile editor isn’t as flexible as the desktop editor, so you are limited in what you can change. However, you can usually make some tweaks to make sure elements are all aligned okay, reorder sections, and even hide them completely when visitors are viewing your site on mobile. (This is handy if you have large media like videos on your site, and don’t want to display them to mobile users who are likely to be using mobile data.)
Set up your domain name
Finally, to publish your site, you need to have it assigned to a domain name (e.g. www.mywebsite.com). You have a few options for doing that:
- Use a free Wix domain name (e.g. username.wix.com/sitename) – This is fine for personal projects, such as a resume or wedding website, but not recommended for professional and business sites.
- You can purchase your own domain name from Wix – If you sign up for a paid yearly plan, a domain name will be included for free in the first year
- Connect your own domain – It usually works out cheaper in the long run to buy a domain name from another provider (e.g. Namecheap), then connect it to your Wix website.
For more information about each of these options, check out our Wix domain guide.
Publish your site
Once you’re ready, all you have to do is hit that “Publish” button at the top right of the editor, and you’ll be live! That’s all there is to it!
Wix Tutorial: Conclusion
In this Wix tutorial, we’ve covered the basics you need to know to get a simple but fully-functional site published on Wix. But as one of the most powerful website builders in the market, there’s plenty more you can do with it – feel free to check out our Wix review to learn more.
If you feel like you’re ready to try out Wix, you can get started here.
Not convinced that Wix is right for you? If you want a website builder that’s even easier to use, we recommend you check out our list of the best website builders.
On the other hand, if you’re after more flexibility and control, then you might want to check out Wix’s more advanced features, such as Wix Editor X or Wix Velo. Note that these require more technical expertise, however. Webflow is also a solid alternative, although once again, it has a much steeper learning curve.
While we didn’t cover it, it’s absolutely possible to add a blog to your Wix site – you can find out how here. However, if your website’s main purpose is blogging, we think that Squarespace or WordPress are actually better for that.
If you want to use your site for selling physical or digital goods, you can add the Wix Stores app to your site – instructions on how to do that are available here. While you can set up your store on Wix’s free plan, you’ll need to select one of Wix’s Ecommerce plans to be able to start selling products.
Wix comes with a huge range of apps and widgets that allow you to add extra functionality and improve your site, such as Wix Bookings, Wix Membership, Wix Shoutout (Wix’s email marketing tool) and many, many more. They even have dedicated apps for restaurant websites, hotels, and more. Check out the Wix App Market to see what’s available, and consult the Wix Help Center for guidance on how to install these apps on your site.
Wix has a comprehensive Help Center with articles and tutorials to help you at every step of the way. In addition, you can also contact Wix Customer Care by submitting a ticket, or requesting a callback.
Yes, there is. You can create up to 100 regular pages. Keep in mind that large Wix websites tend to load more slowly, especially in the backend when you work with the editor.
Our general advice is to not go over 30 static pages if you can avoid it.
Excluded from this limit are blog pages and dynamic pages.
The authors
Learn more about us

We keep our content up to date
23 Mar 2023 - Tutorial updated
16 Mar 2023 - New video tutorial
09 Jan 2023 - FAQ updated
9 Dec 2022 - Smaller updates and corrections
24 Nov 2021 - Checked for accuracy and smaller updates
29 Dec 2020 - Video tutorial added
THE BEHIND THE SCENES OF THIS BLOG
This article has been written and researched following a precise methodology.
Our methodology